FAQs + Repairs
All the information from inflation to deflation to repairs.
This is the section you find it all in. If you can't find your answer here feel free to contact us.
FAQs
- Start by blowing up the boat with the large inflation valve getting the boat 90% to 95% full
- Put on nylon cap with tube valve
- Top off and make boat tight through the tube valve

Yes we do! It is available under accessories in our shop!
There are also some battery powered pumps available on the market - we use a microburst pump
You should always use a certified Type III PDF with our inflatable boats. The lightest Type III PFD we use is the MTI Journey the large weights approx. 13 ounces.
All boats include 2 field repair patches, tube valve with nylon gasket and cap
This little gasket is helpful but not necessary to seal the valve, the gasket is included to assist in sandy and gritty environments to help make a tight seal on the valve. The best way to store the gasket is to remove it from the nylon cap and place it on the tube. If you lose the gasket just make sure the valve stem and the nylon cap are free of sand or dirt.
The Canyon Flatwater 2 has a weight limit of 200 pounds. The Matkat has a weight limit of 325 pounds. The weight limit is about buoyancy and not about maneuverability. The boat will stay afloat up to the weight limit. Please note the closer you get to the weight limit the harder the boat will be to maneuver and it will handle differently and you can get water in the cockpit. If you are close to the weight limit of the Canyon Flatwater we recommend going with the Matkat.
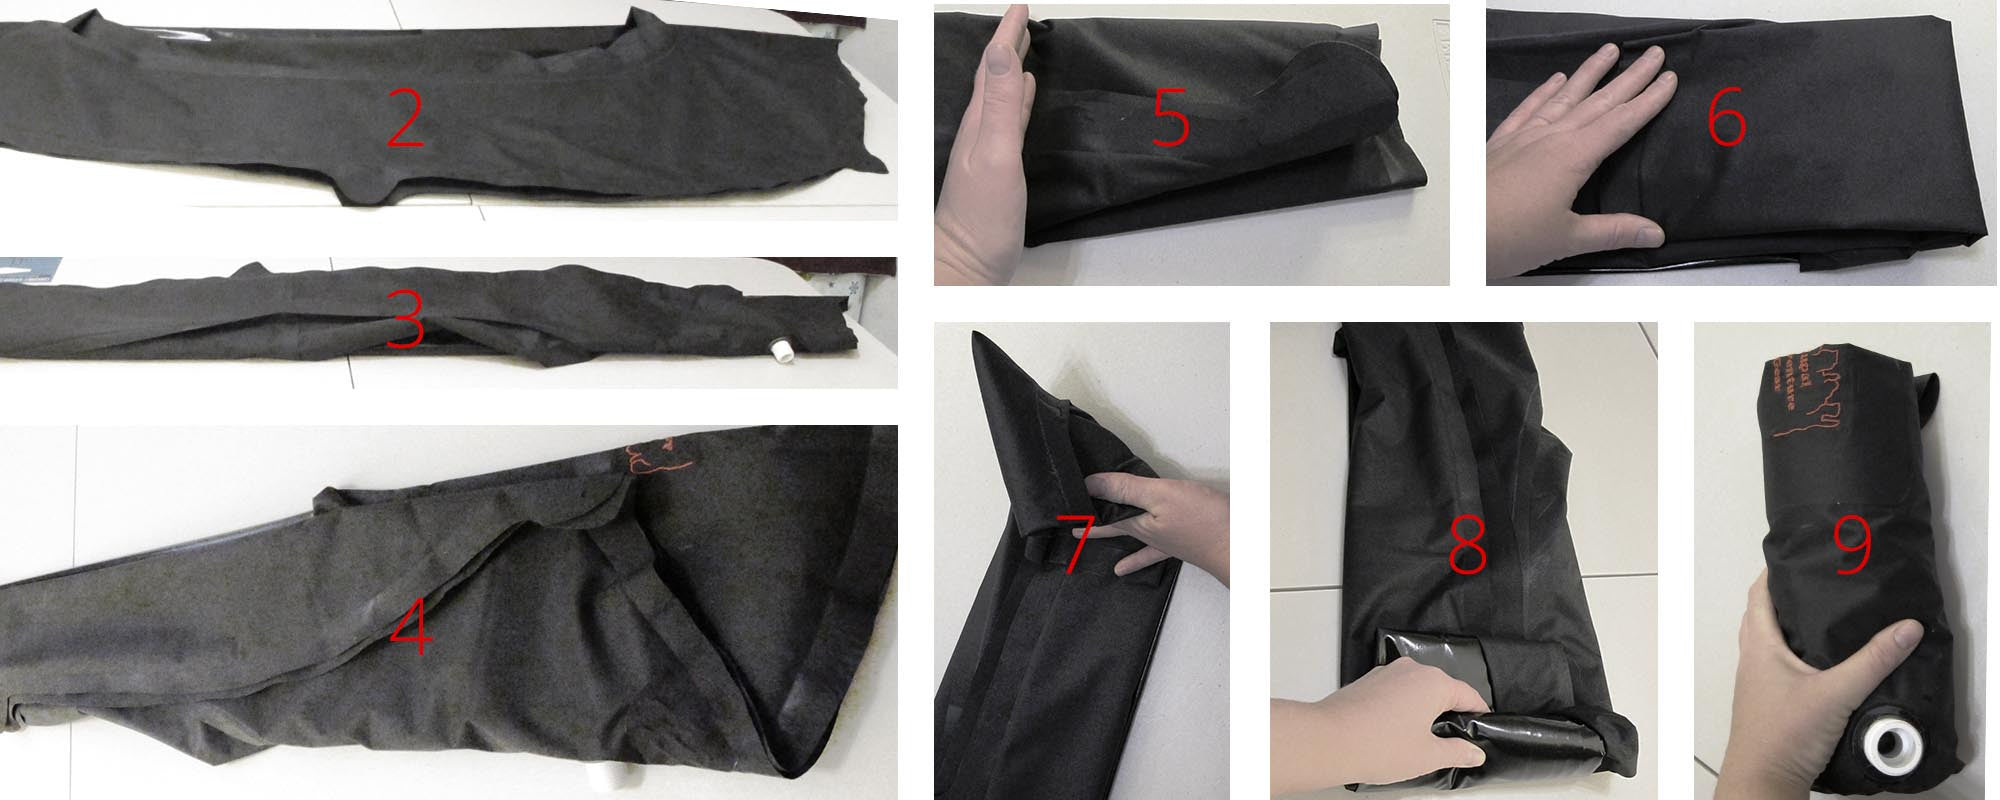
HOW DO I FOLD MY BOAT?

One.
Find a flat surface and get as much of the air out of the boat as possible
Two.
Lay the boat bottom side up
Three.
Going from right to left fold boat in half
Four.
Going from left to right fold boat in half again
Five.
Taking what small overlap is left fold it back from right to left
Six.
Going to the front of the boat take about six inches and fold toward back of boat
Seven.
Repeat this fold three times, making sure to press the air out of the boat after each fold
Eight & Nine.
Start to roll the boat in a tight roll toward the valve. When done boat should be tight ready for the trip
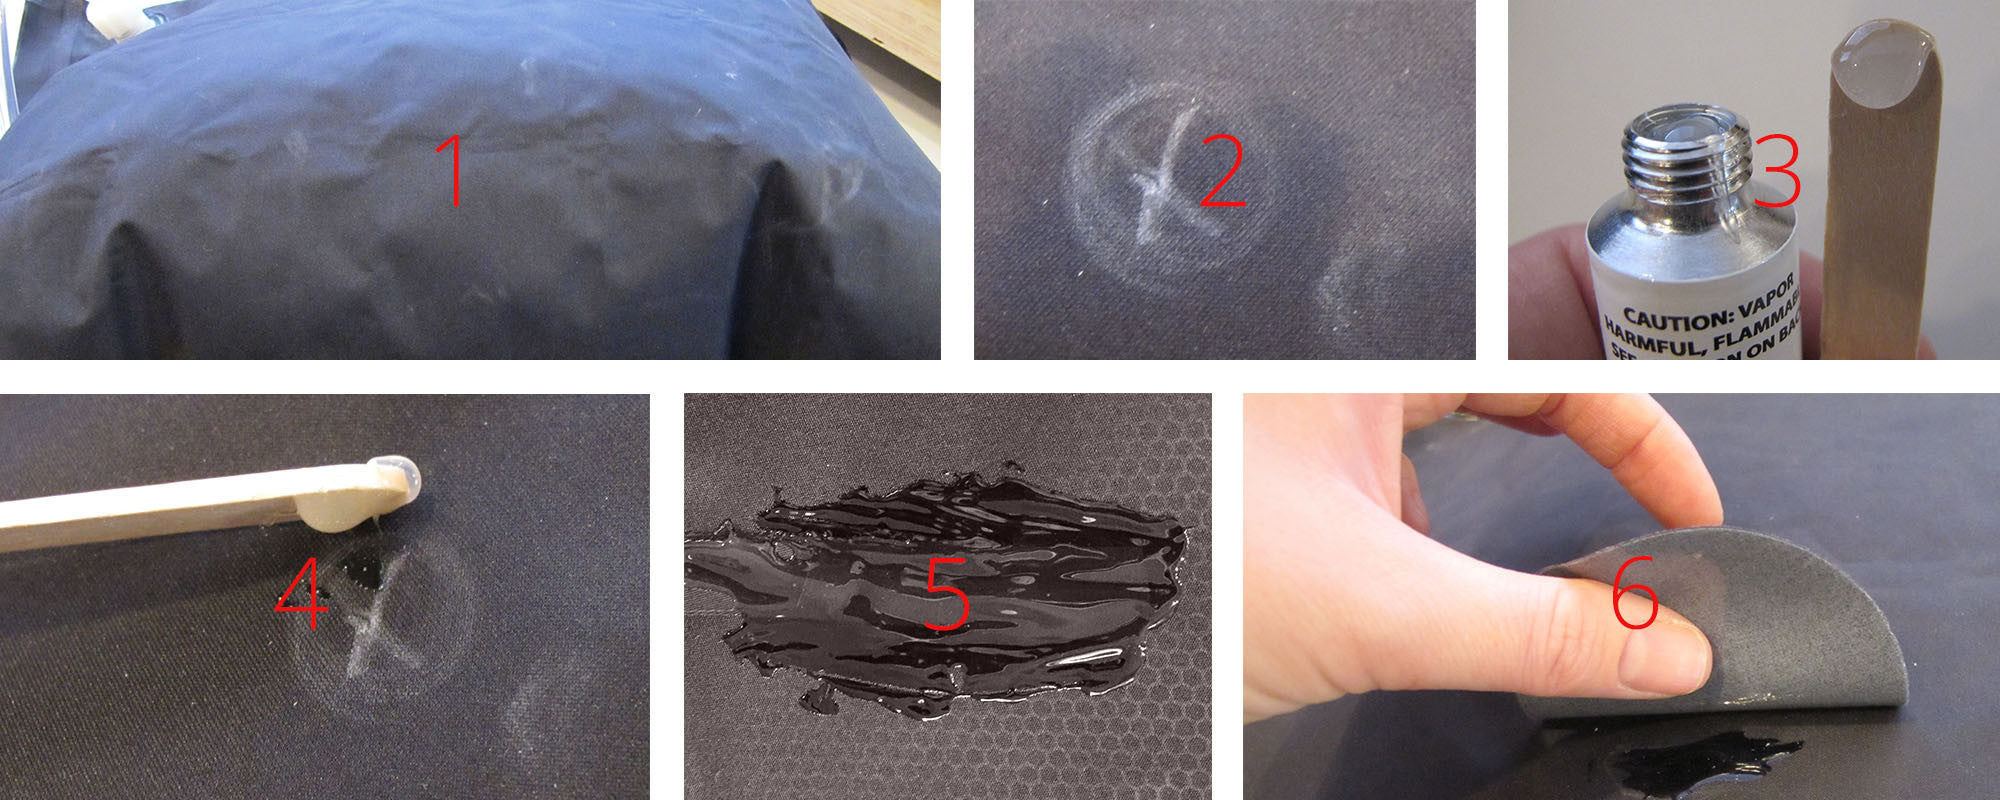
How do I repair a small hole or tear in my boat?

One.
Partially inflate the boat to allow for the fabric to be loose but not tight. The main goal of this is to have the inside of the boat not touching
Two.
Locate and mark the small pin prick hole or tear with a pencil so you know exactly where to apply aquaseal
Three.
Open aquaseal and place a small amount on the end of your disposable applicator
Four.
Making sure the area is clean and dry, apply aquaseal to the small hole and spread out a bit to get good coverage and to make sure the hole is sealed
Five.
Allow the aquaseal to completely dry. This process can take up to 24 hours
Six.
Once the aquaseal is completely dry cover the repair with a patch – Please note this is not necessary but it will protect the aquaseal from abrasion
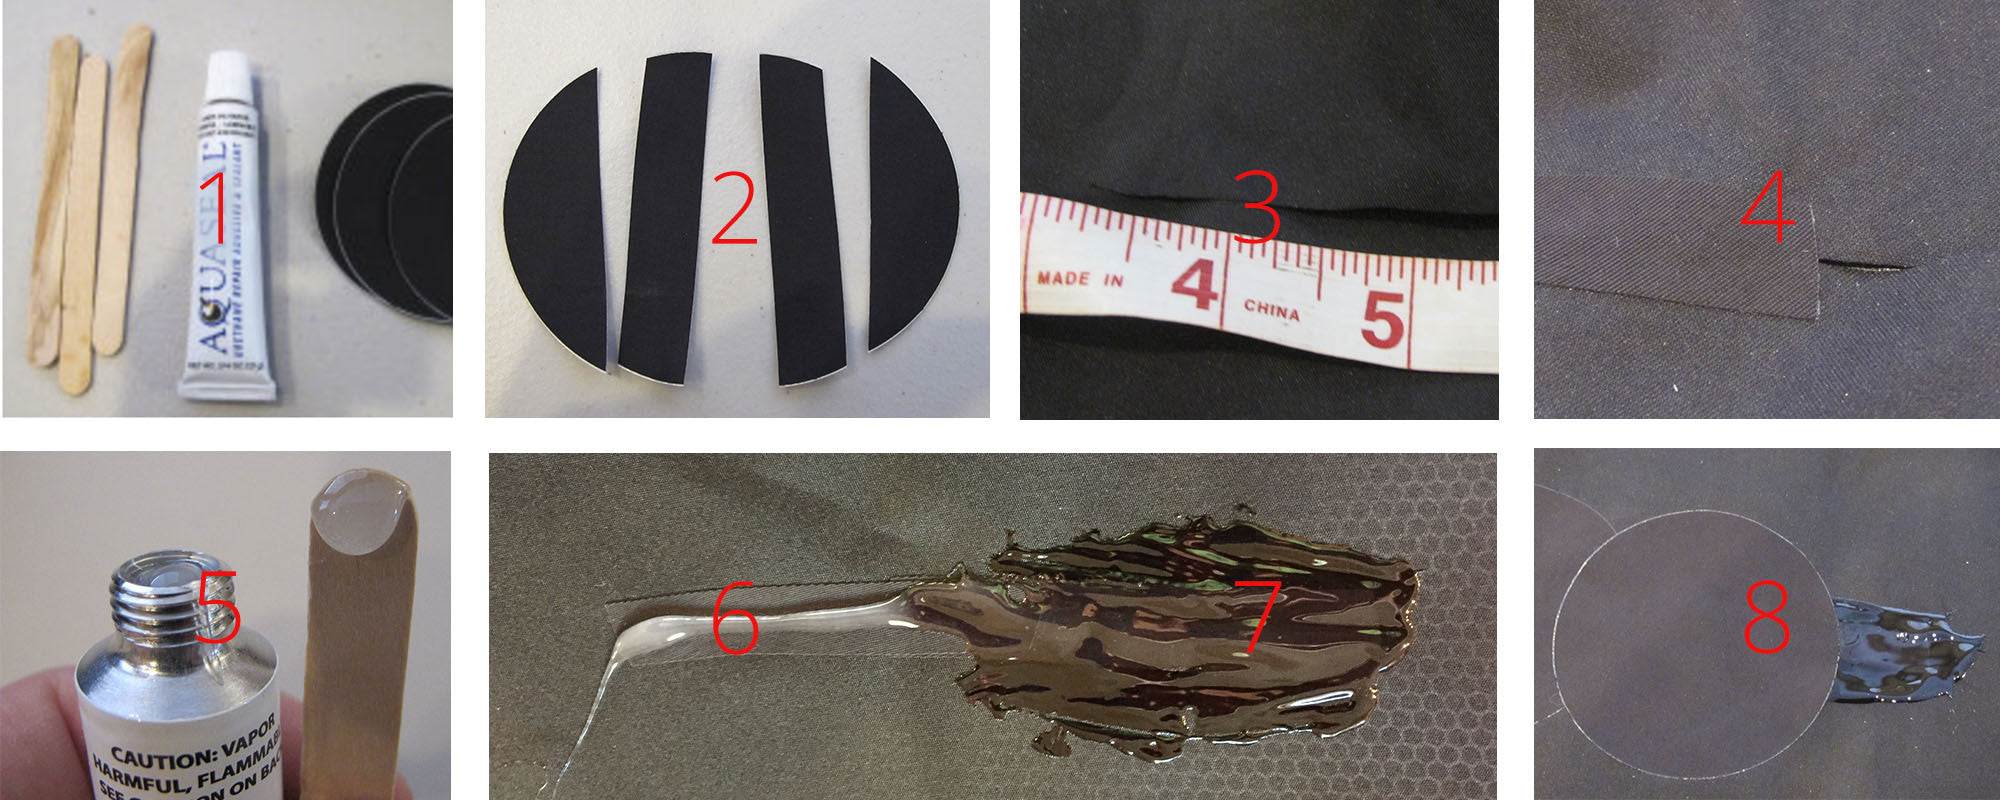
How do I repair a large hole in my boat?

One.
Assemble tools to repair boat: disposable applicator(s), aquaseal, patch(es)
Two.
Cut one patch into strips, large enough to seal tear in boat
Three.
Making sure the boat is completely deflated and lying flat, locate the large tear
Four.
place patch strips length wise across tear, keep doing this till the hole tear is sealed with patches
Five.
Place a small amount of aquaseal on the end of your disposable applicator
Six.
Make sure the area is clean & dry, apply aquaseal over patch strips & tear. Make sure to cover all sides, sealing the patch strips to the boat
Seven.
ALLOW aquaseal to completely dry – it can take up to 24 hours
Eight.
Once the aquaseal is completely dry cover the repair with patches to complete the repair


